
Google Tag Manager (GTM)
Getting Started
This is a step-by-step guide to integration with Google Tag Manager (GTM). From here on out, we will refer Google Tag Manager as GTM.
Please follow the steps below to implement them correctly.
This integration will only take about 20-30 minutes to complete.
Prerequisites
- This guide will cover adding GTM triggers and GTM tags
- Please take note the merchant must already be sending order_id information and order_amount information from the website to GTM
- If the above variables are not set up, please contact your ShopBack representative to get assistance or notify your respective web development team to add it to the GTM Data Layer
Step 1: Adding GTM Triggers
GTM Triggers are used to detect when
- ShopBack redirects the ShopBack user to the merchant
- When a user completes an order
Please ignore this step if you have already completed the setup for specific triggers for page landing and also the confirmation page.
1A. Adding ShopBack landing page trigger
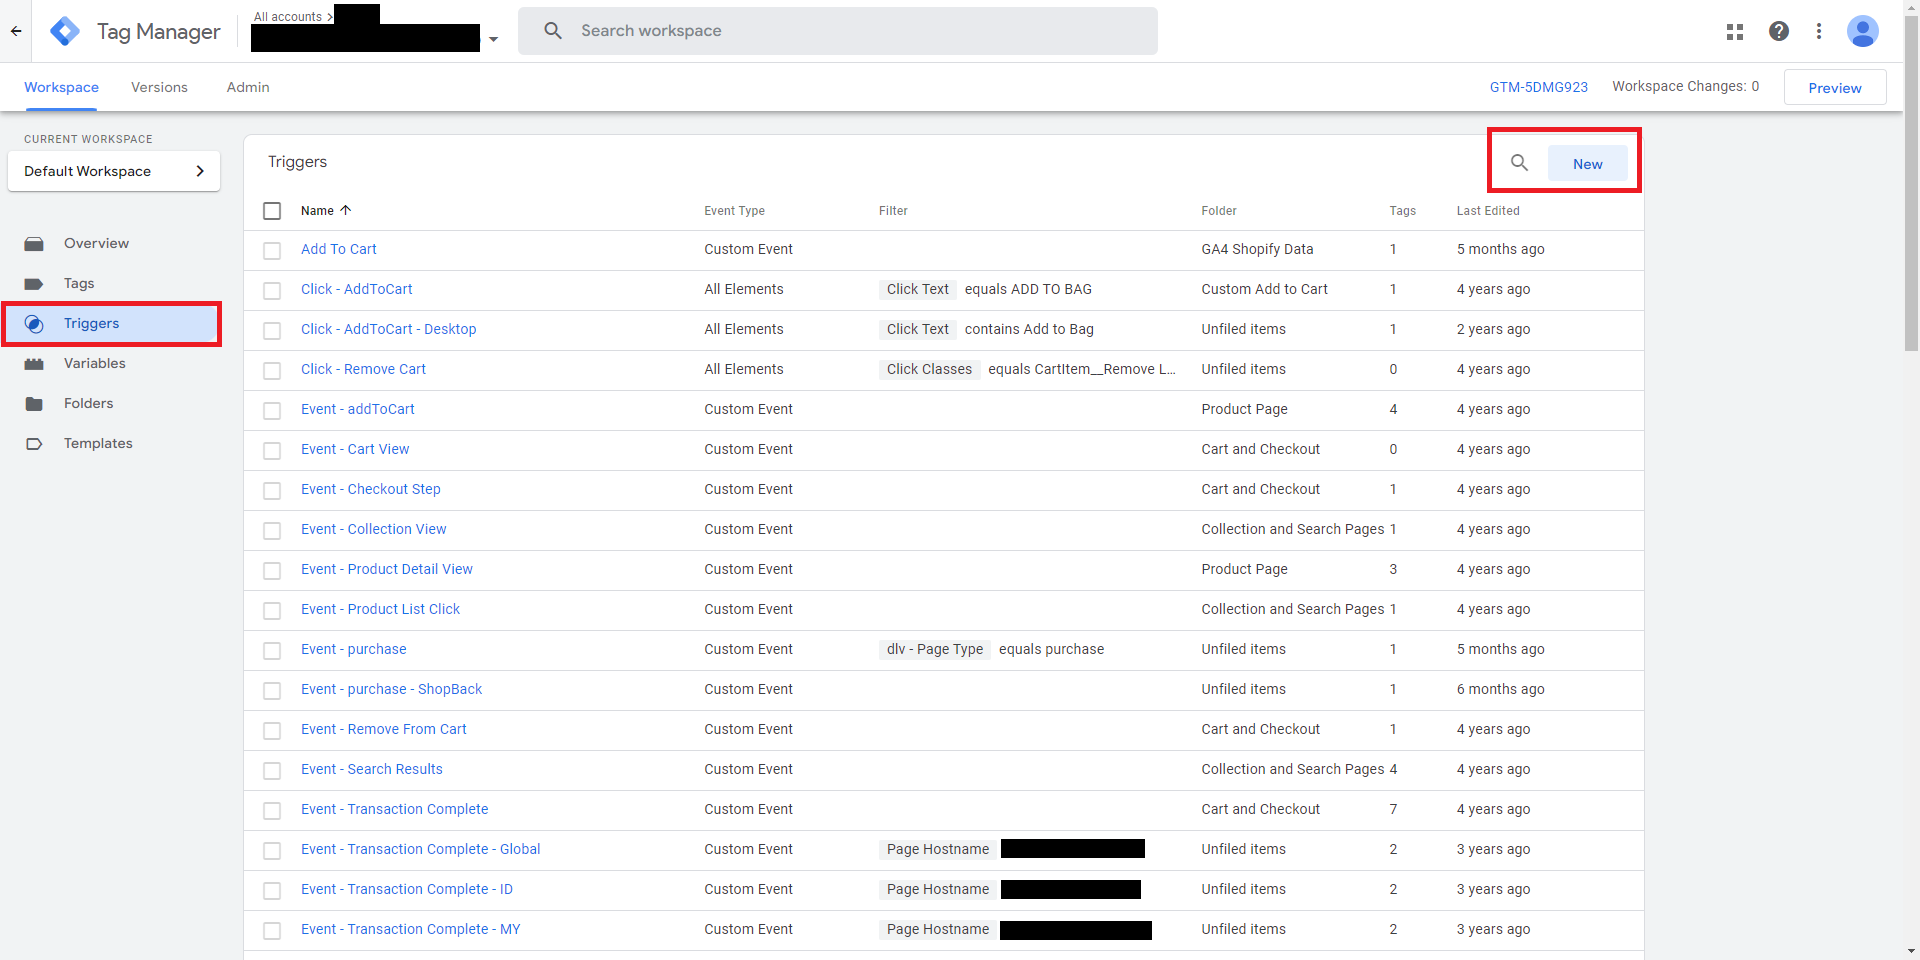
On the sidebar, under Workspace, select Triggers and click click “New”
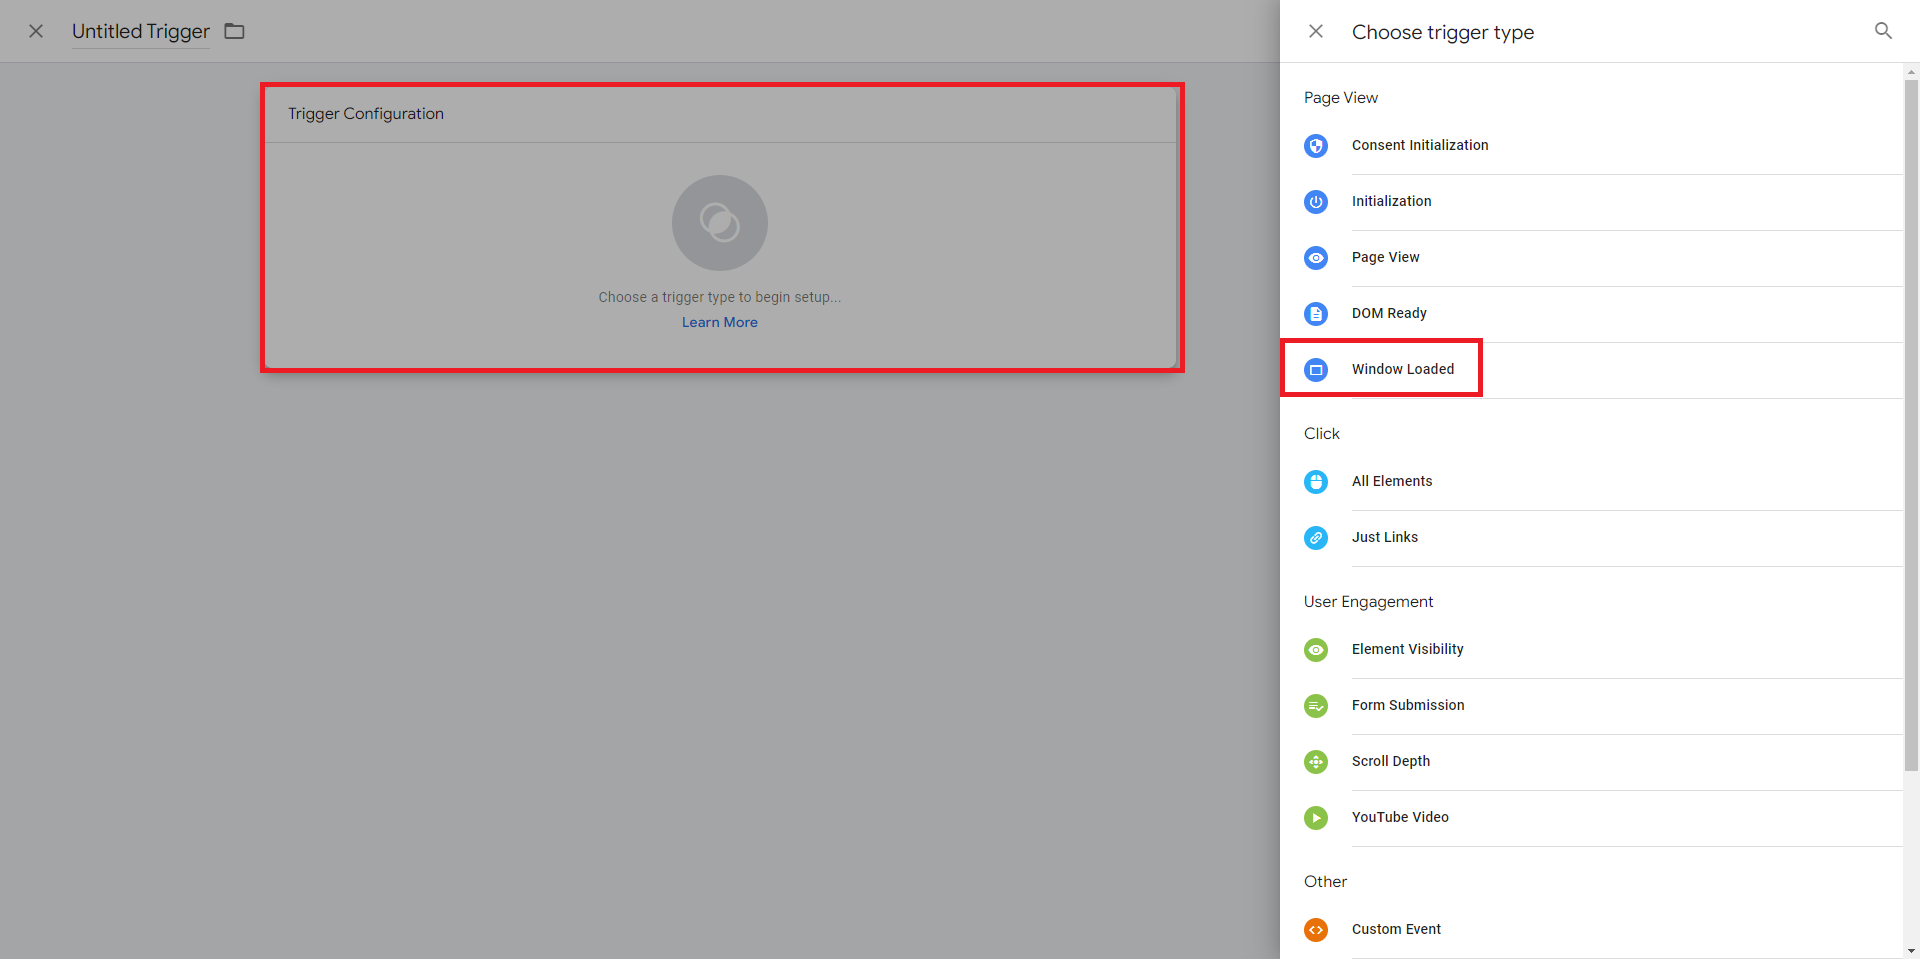
Click on “Trigger Configuration” and select “Window Loaded”
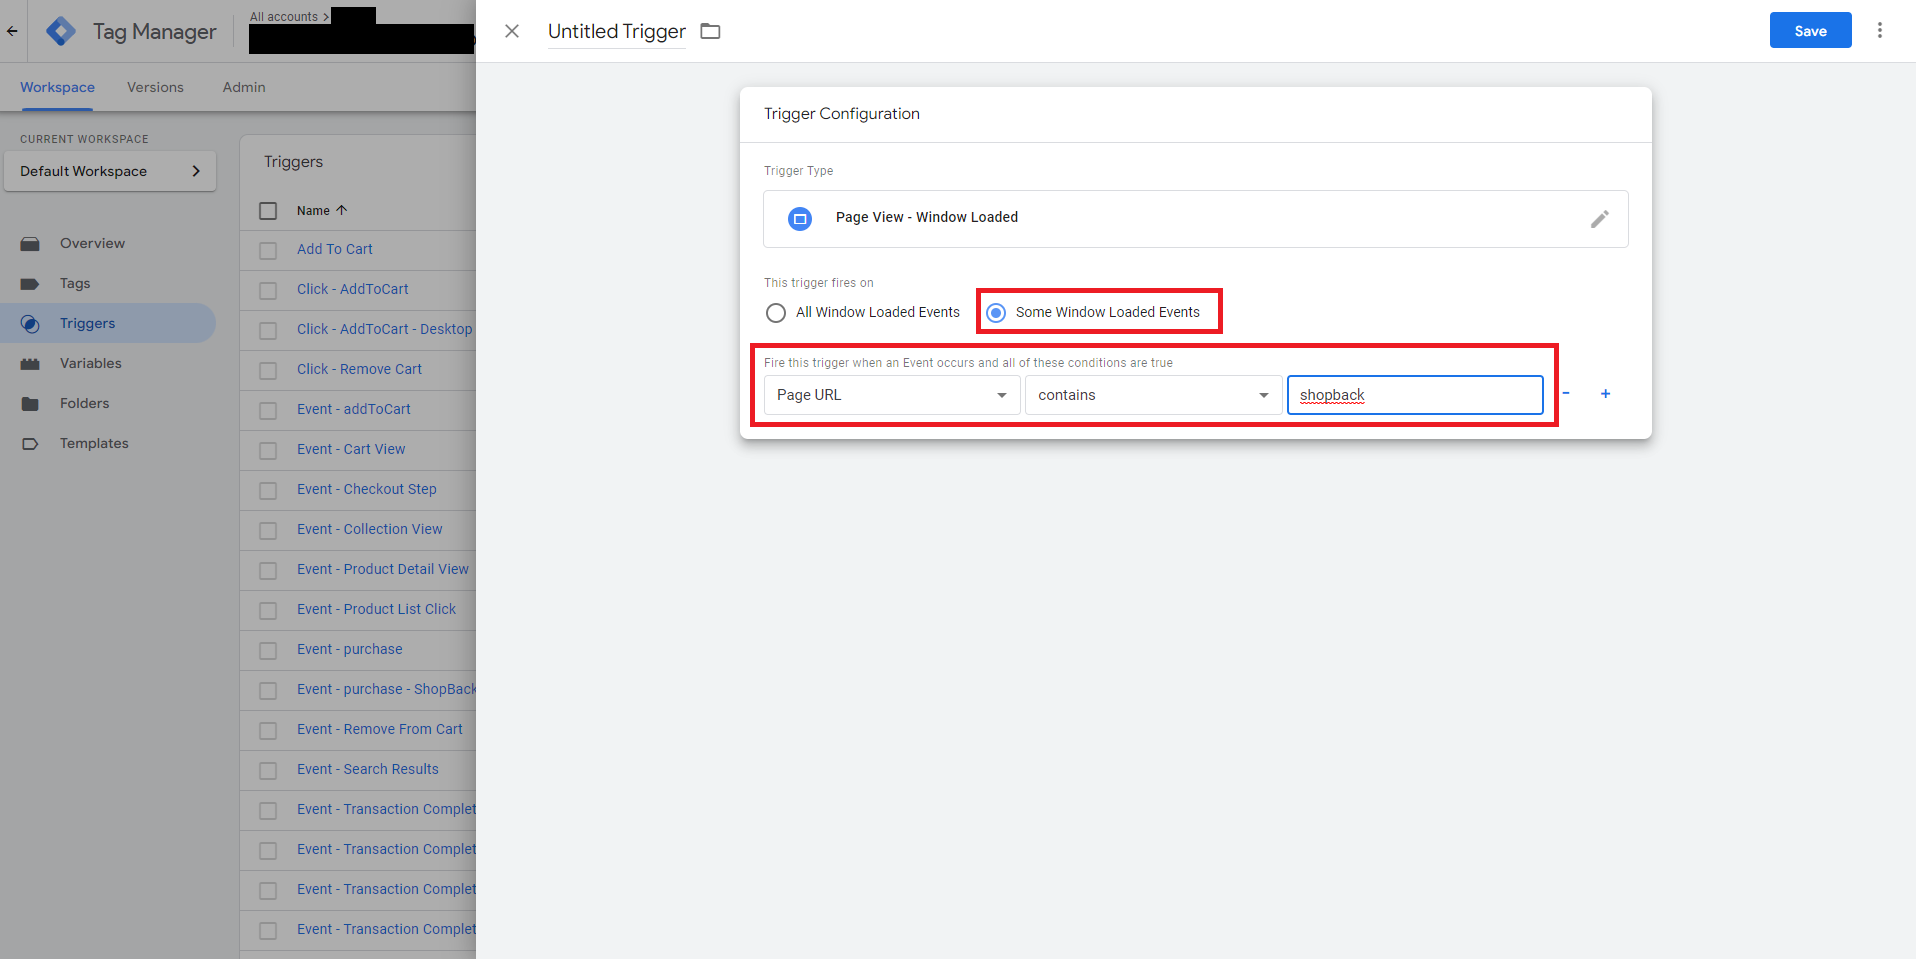
Select “Some Window Loaded Events”, and select “Page URL” “contains” “shopback”. Name the trigger and click “Save”. Example of a good trigger name, ShopBack - Trigger - Landing Page
1B. Adding ShopBack order confirmation trigger
On the sidebar, under Workspace, select Triggers and click click “New”
Click on “Trigger Configuration” and select “Window Loaded”

Select “Some Window Loaded Events”, and select “Page URL” “contains” “/thankyou/” (example). Name the trigger and click “Save”. A good example trigger name, ShopBack - Trigger - Order Confirmation Page
Additional Information for Order Confirmation TriggerIn the previous step, the example given for the keyword is “/order/”, this might change according to the platform used and how the order confirmation URL structure is setup.
The keyword above must match to your confirmation page URL keywords. Some common examples are “page/thankyou”, “/orderconfirmation”,”/order”.
Please enter the keyword accordingly.
Step 2: Adding GTM Tags
After adding the triggers, we can proceed to add the GTM Tags.
GTM tags are the actual instructions to execute when a trigger is detected. This step serves to track the transaction details after the customer has completed the transaction.
2A. Adding ShopBack landing page tag
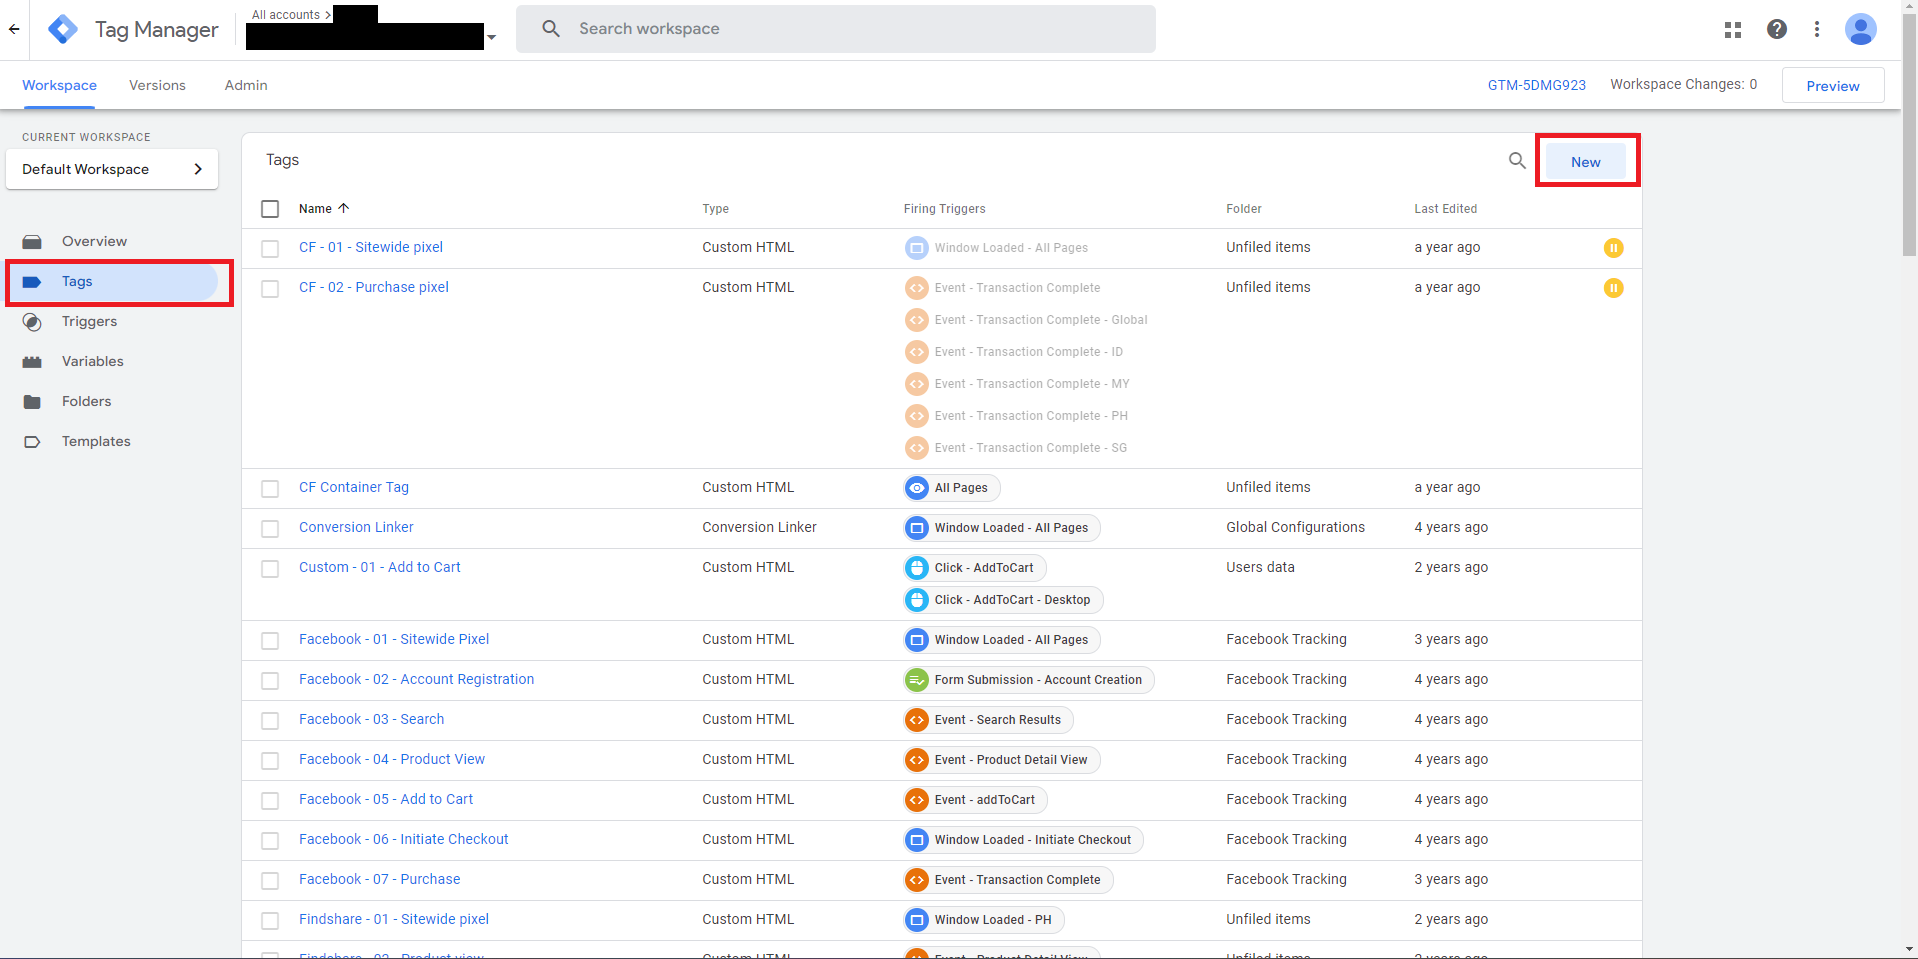
Head to "Tags" under Workspace and click “New”
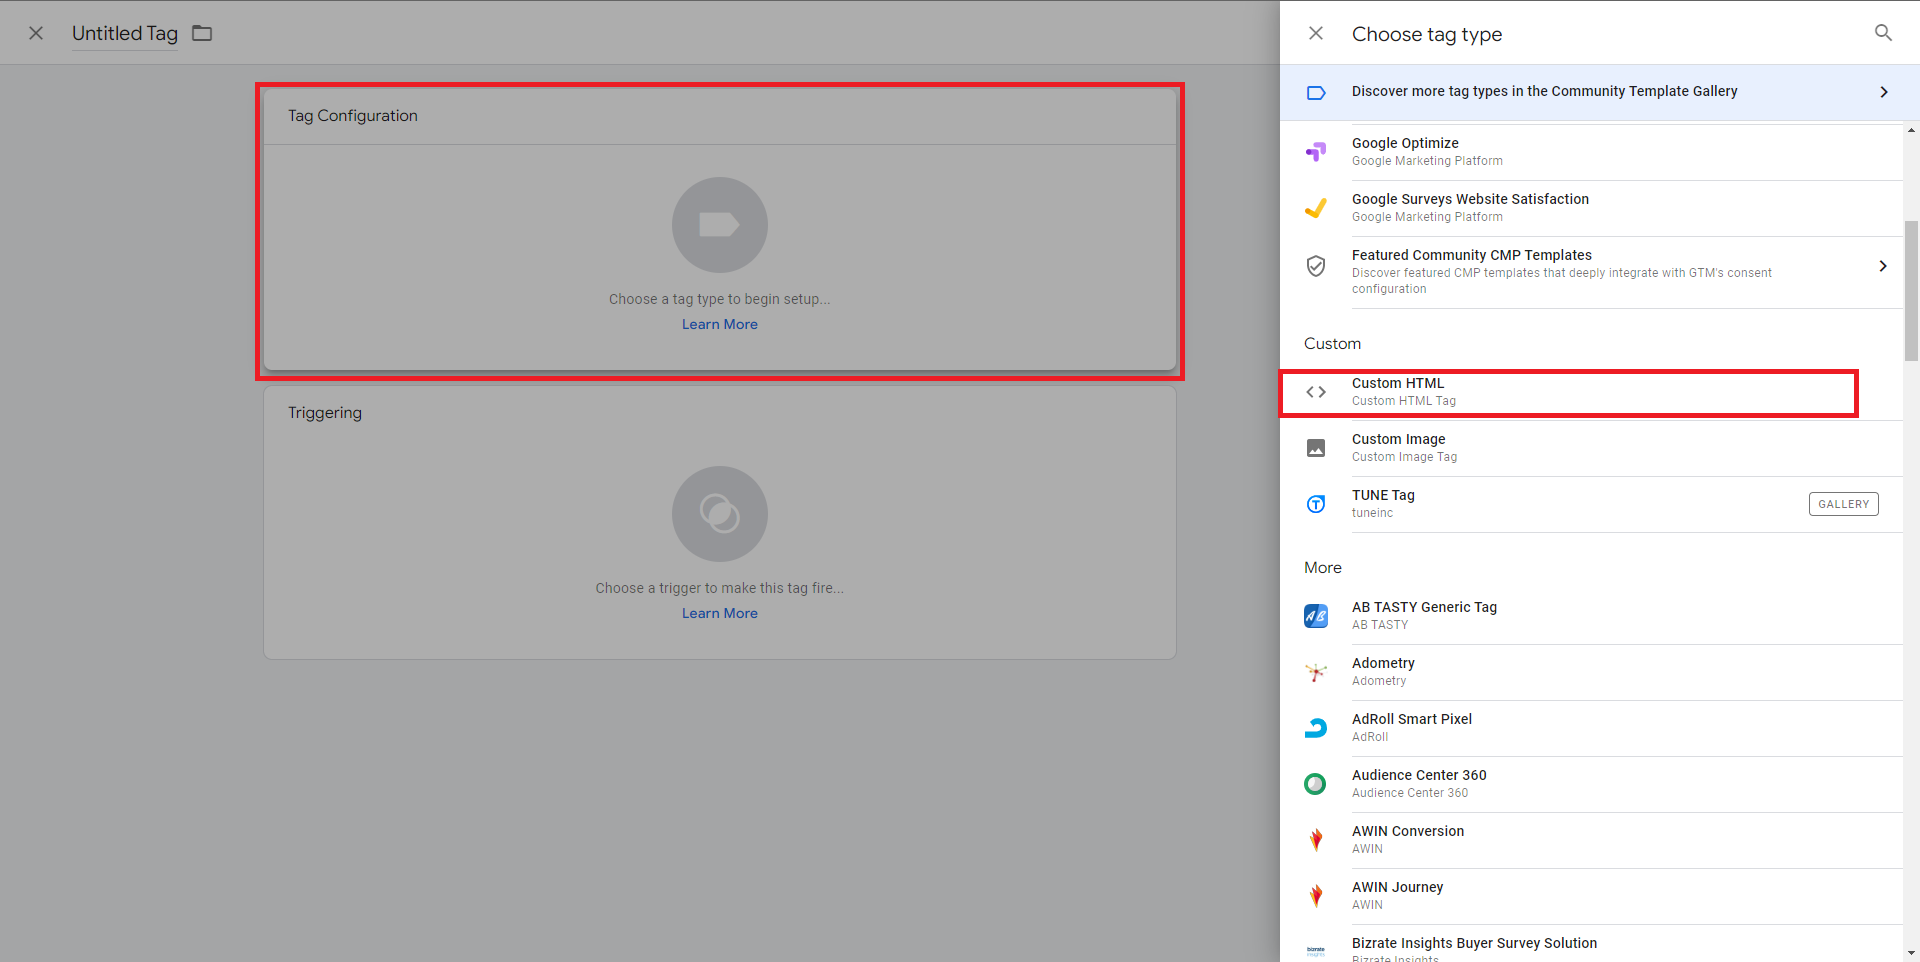
Click “Tag Configuration”. Scroll down to locate and click “Custom HTML Tag”
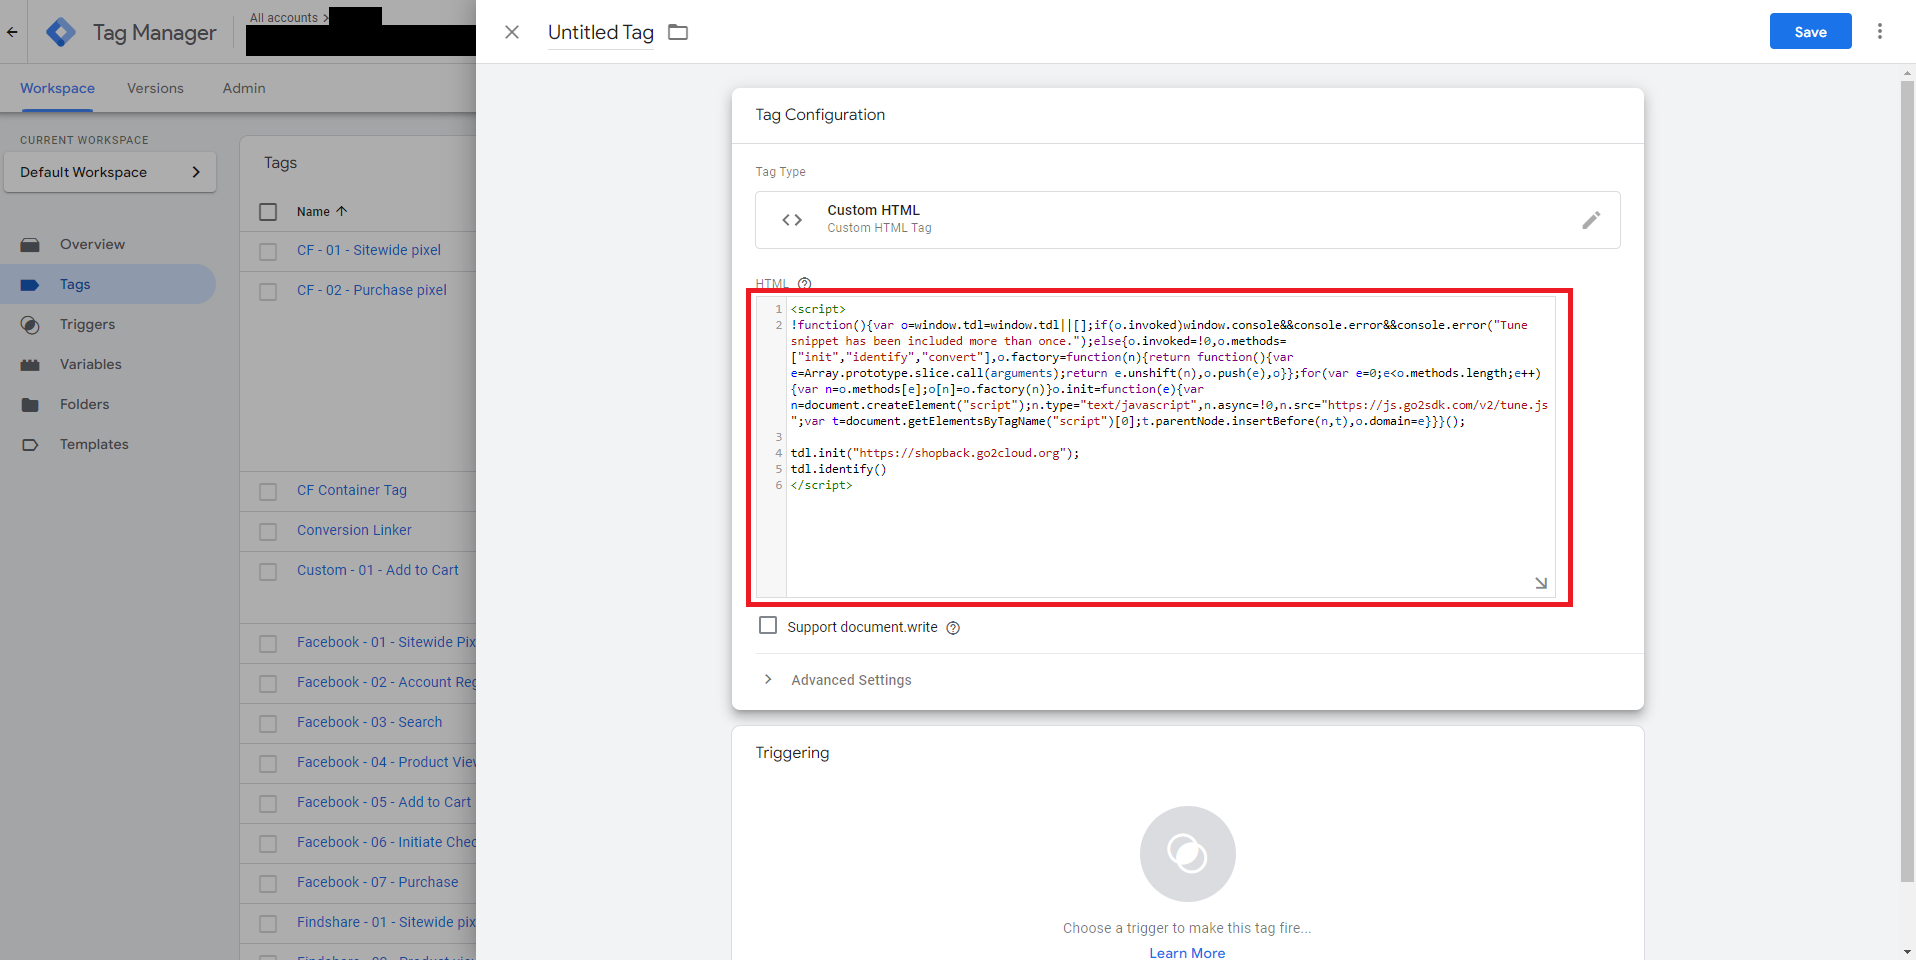
Add the code located underneath to the HTML section. Copy as is. No changes are required.
<script>
!function(){var o=window.tdl=window.tdl||[];if(o.invoked)window.console&&console.error&&console.error("Tune snippet has been included more than once.");else{o.invoked=!0,o.methods=["init","identify","convert"],o.factory=function(n){return function(){var e=Array.prototype.slice.call(arguments);return e.unshift(n),o.push(e),o}};for(var e=0;e<o.methods.length;e++){var n=o.methods[e];o[n]=o.factory(n)}o.init=function(e){var n=document.createElement("script");n.type="text/javascript",n.async=!0,n.src="https://js.go2sdk.com/v2/tune.js";var t=document.getElementsByTagName("script")[0];t.parentNode.insertBefore(n,t),o.domain=e}}}();

tdl.init("https://shopback.go2cloud.org");
tdl.identify()
</script>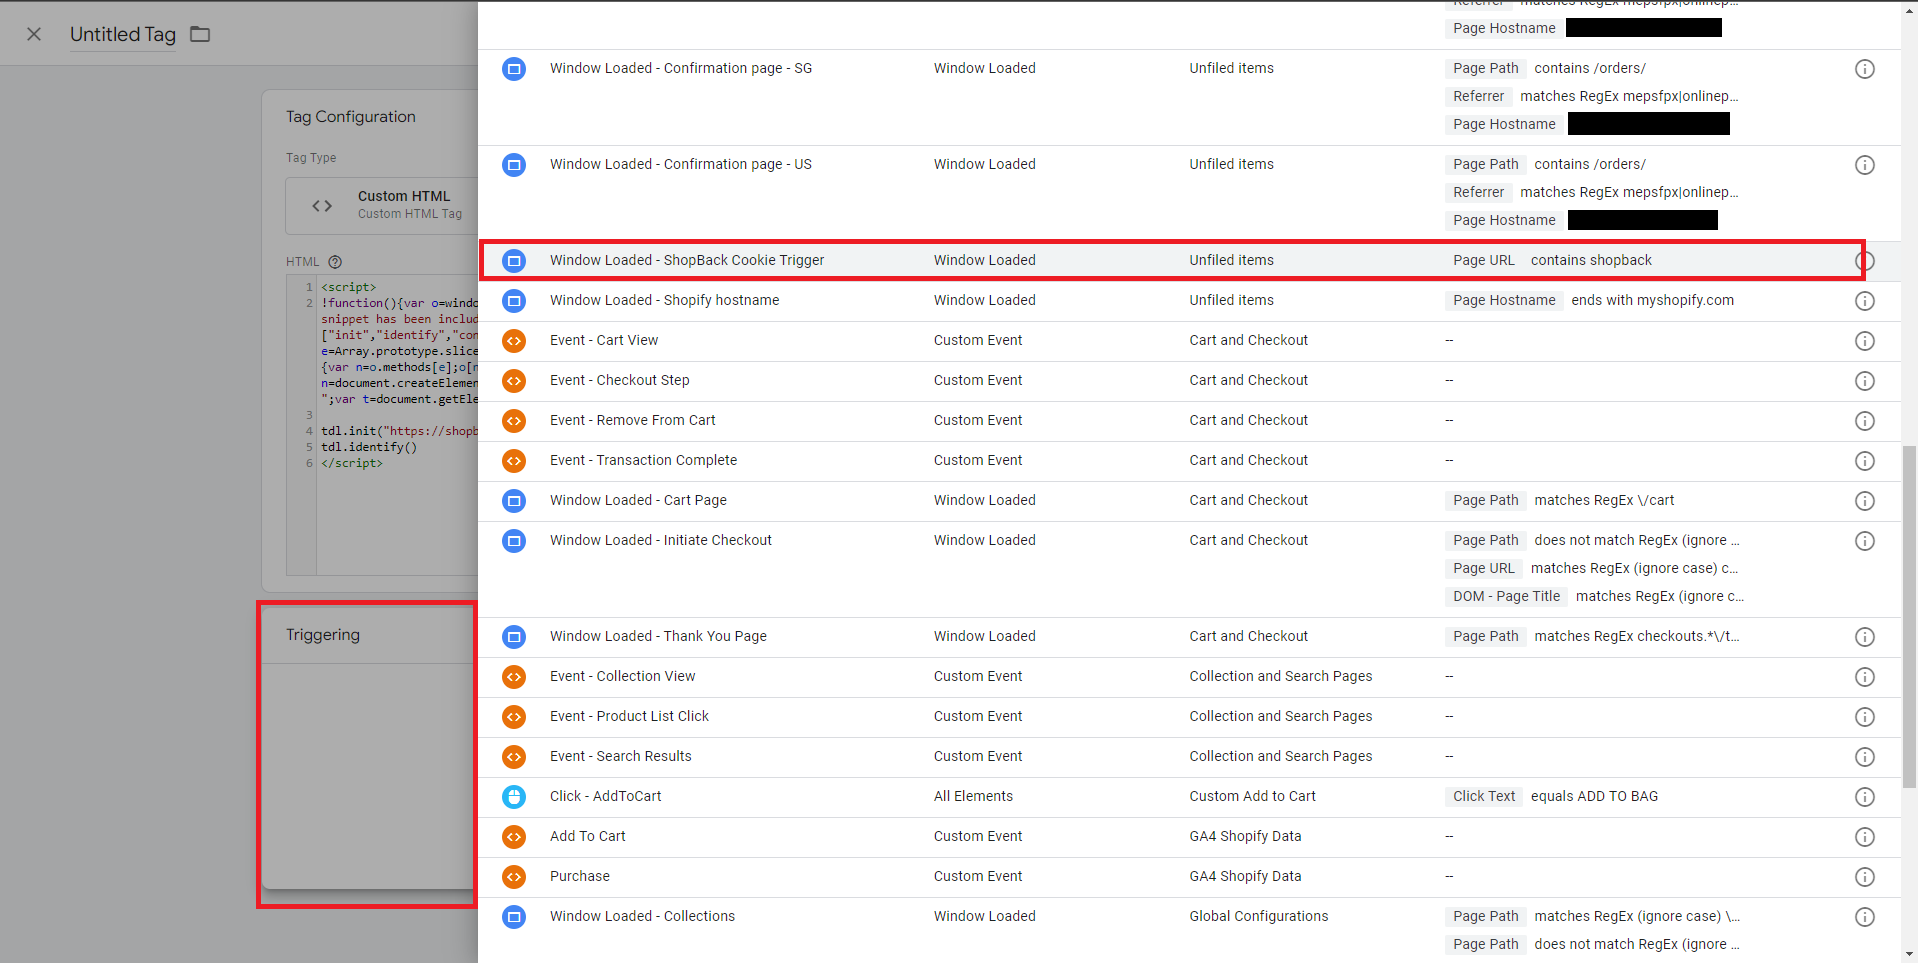
After inserting the HTML, click "Triggering". Search and click the "ShopBack - Trigger - Landing Page"
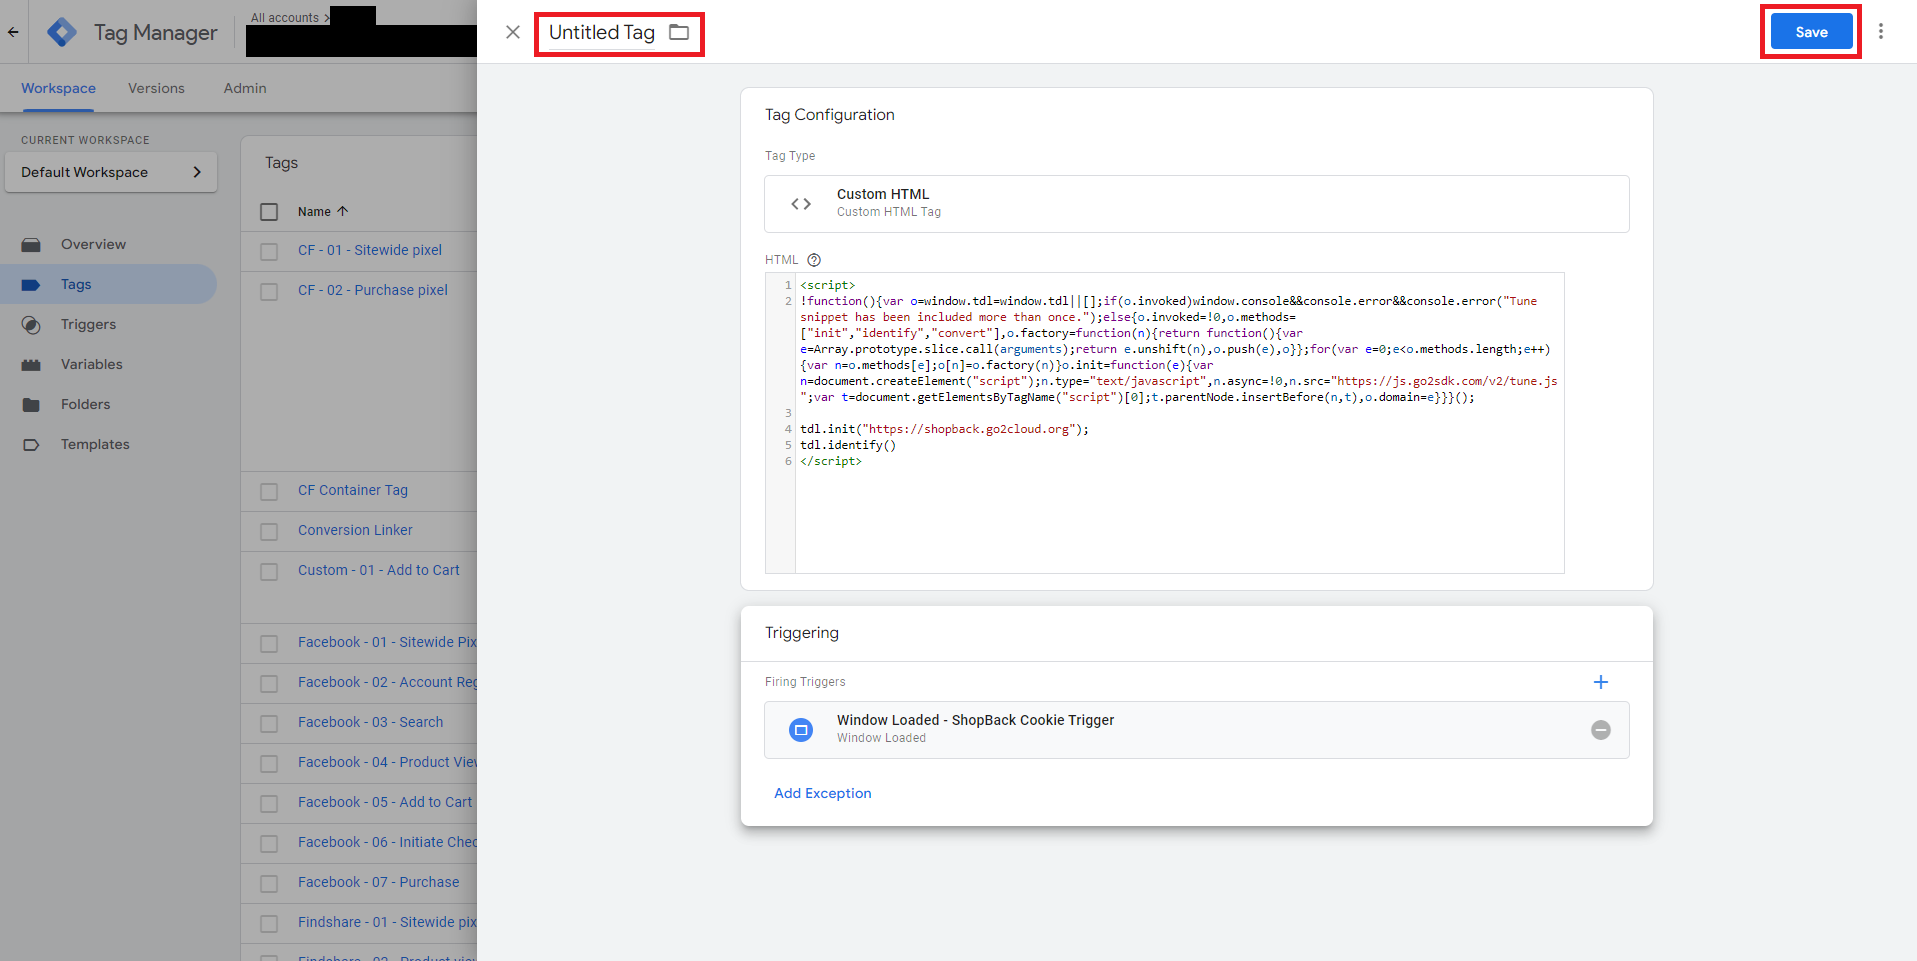
Name the Tag appropriately, e.g. “ShopBack - Tag - Landing Page” and click “Save”
2B. Adding ShopBack Order Confirmation tag
Head to "Tags" under Workspace and click “New”
Click “Tag Configuration”. Scroll down to locate and click “Custom HTML Tag”
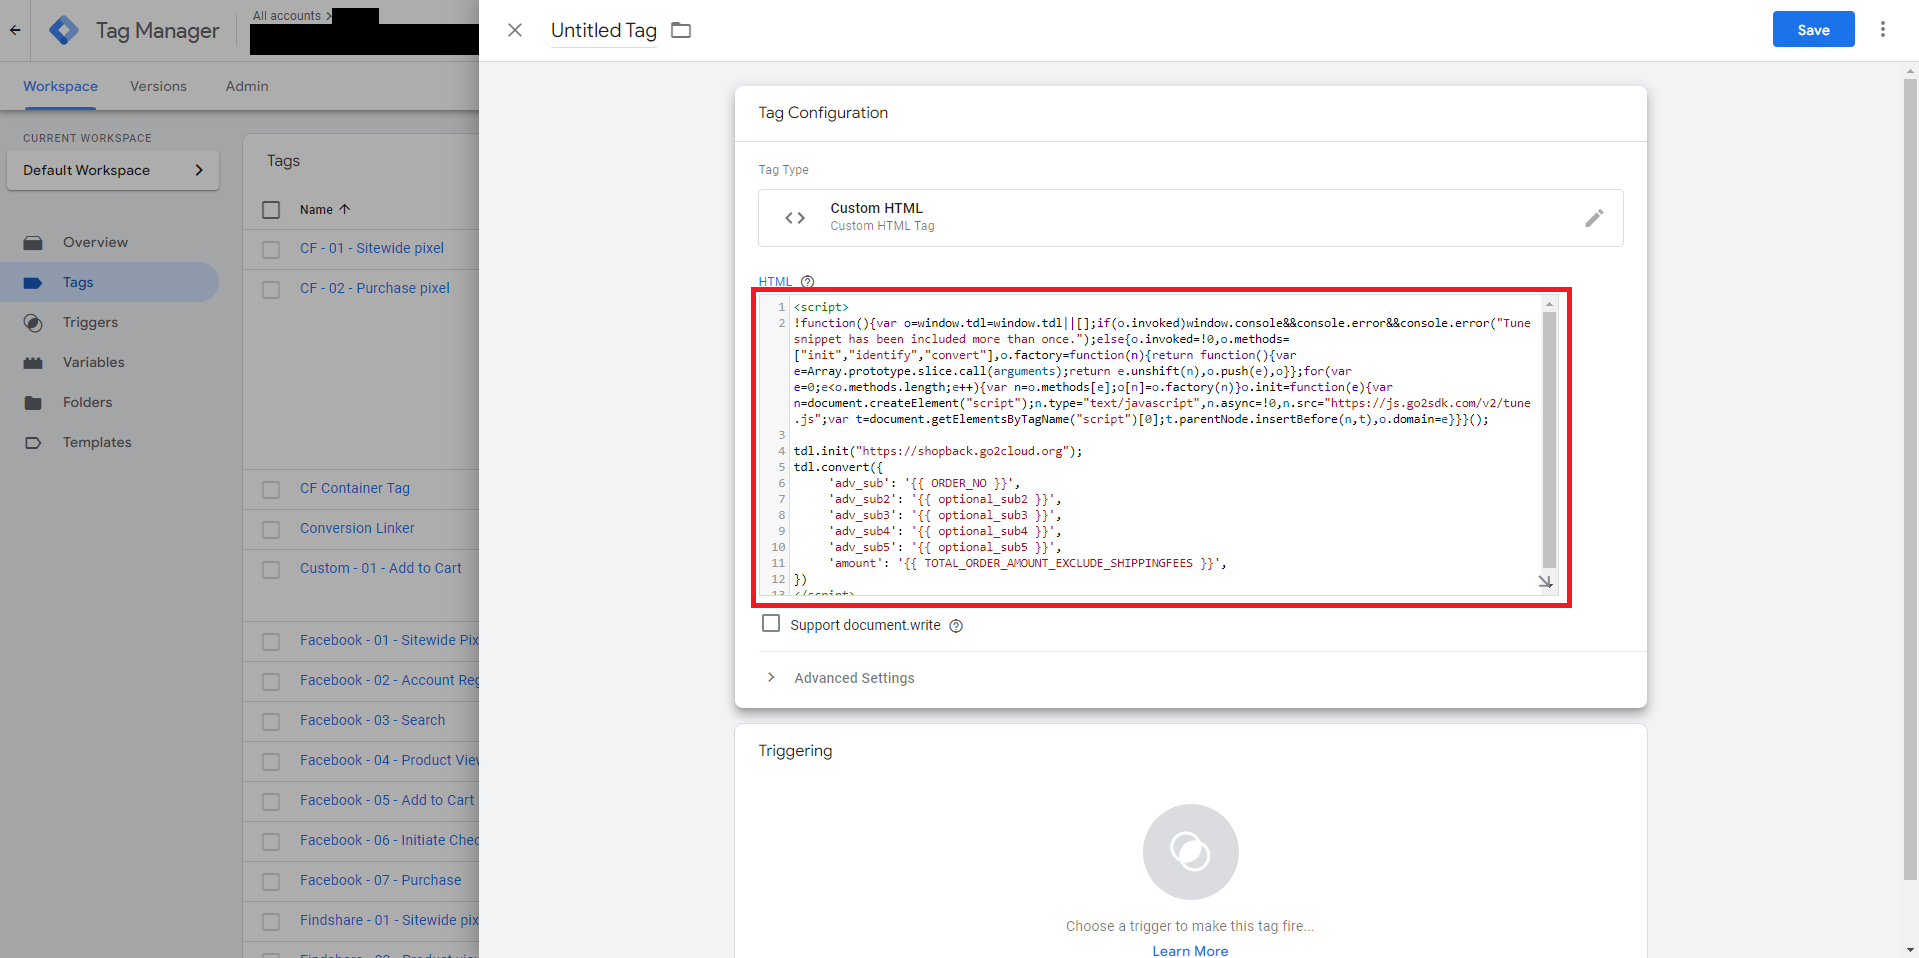
Add the code located underneath to the HTML section. Please read the additional section on adding the correct variables.
<script>
!function(){var o=window.tdl=window.tdl||[];if(o.invoked)window.console&&console.error&&console.error("Tune snippet has been included more than once.");else{o.invoked=!0,o.methods=["init","identify","convert"],o.factory=function(n){return function(){var e=Array.prototype.slice.call(arguments);return e.unshift(n),o.push(e),o}};for(var e=0;e<o.methods.length;e++){var n=o.methods[e];o[n]=o.factory(n)}o.init=function(e){var n=document.createElement("script");n.type="text/javascript",n.async=!0,n.src="https://js.go2sdk.com/v2/tune.js";var t=document.getElementsByTagName("script")[0];t.parentNode.insertBefore(n,t),o.domain=e}}}();

tdl.init("https://shopback.go2cloud.org");
tdl.convert({
     'adv_sub': '{{ customer_facing_order_id }}',
     'adv_sub2': '{{ optional_sub2 }}',
     'adv_sub3': '{{ optional_sub3 }}',
     'adv_sub4': '{{ optional_sub4 }}',
     'adv_sub5': '{{ optional_sub5 }}',
     'amount': '{{ order_total }}',
})
</script>
Use of GTM VariablesThe above code will require minor changes to insert specific GTM Variables.
Please take note to replace the above {{ ODRER_NO }} values with the appropriate GTM Variables that are already defined. Please seek additional information from your web provider to add the proper GTM Variables.
ShopBack requires a minimum of 2 variables to be captured which are:
- adv_sub - Customer facing order id
- amount - Customer paid amount excluding shipping fees and taxes
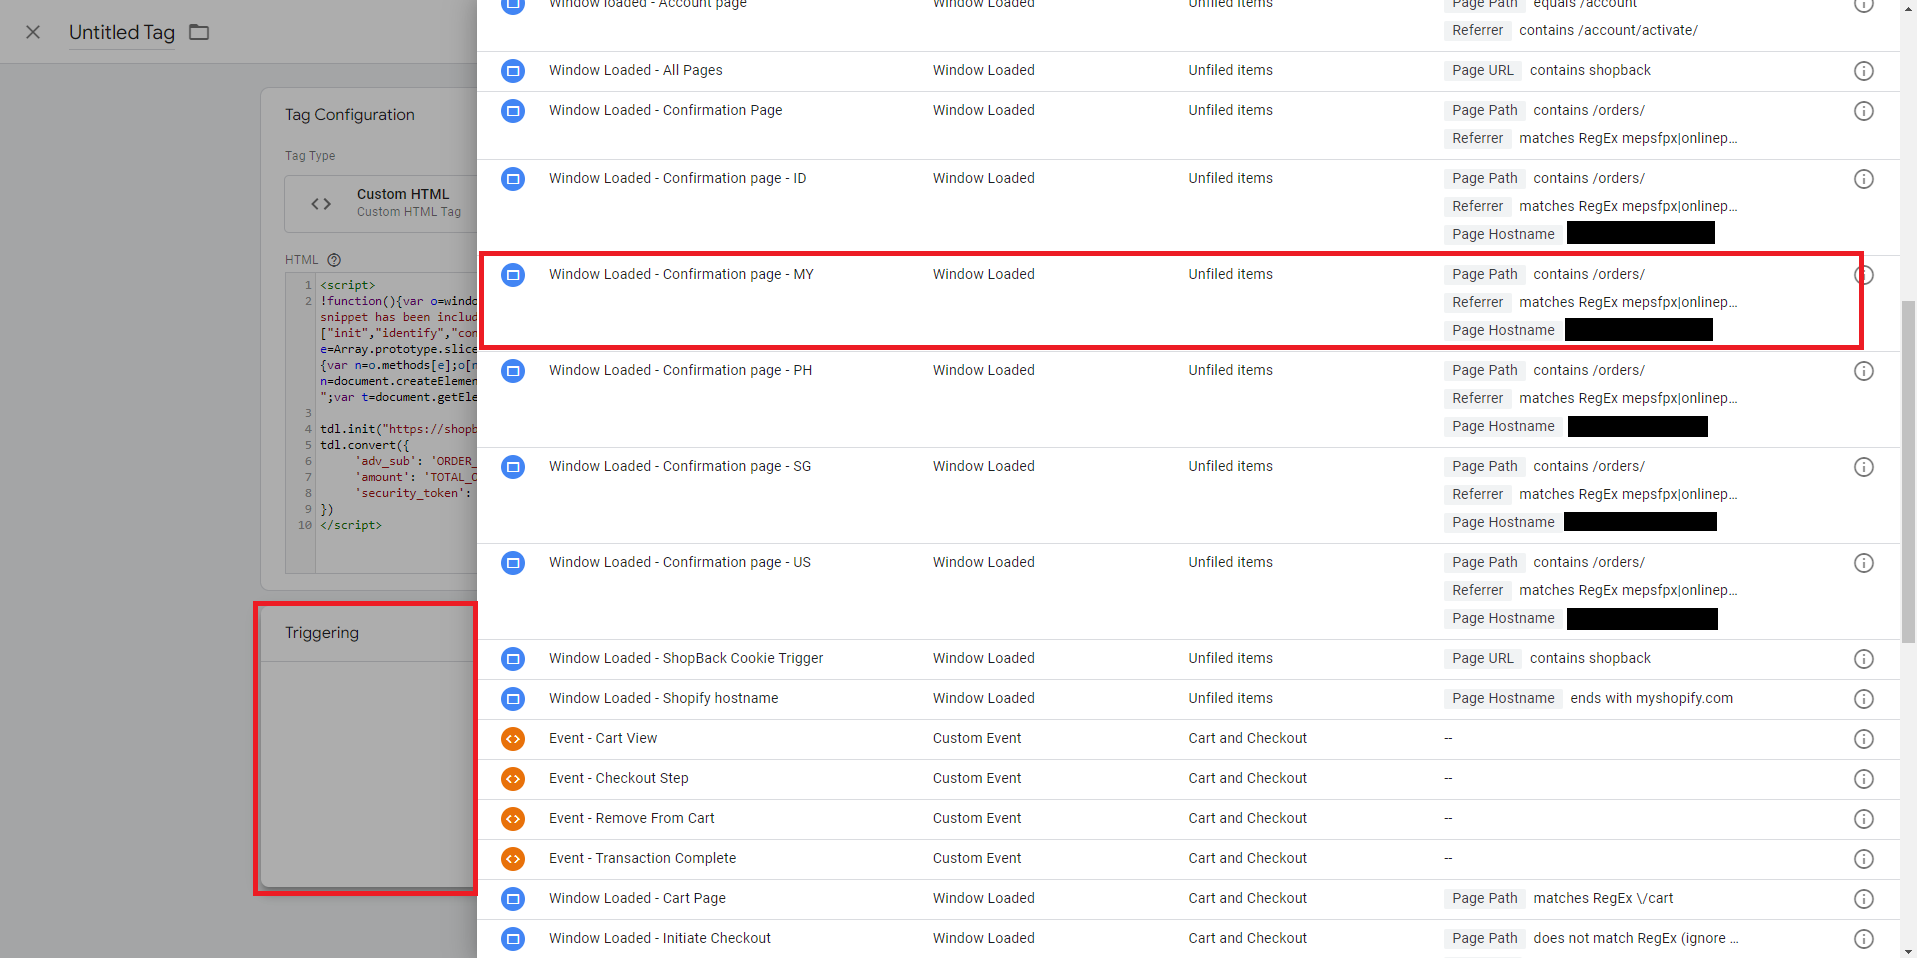
After inserting the HTML, click "Triggering". Search and click the "ShopBack - Trigger - Order Confirmation Page"
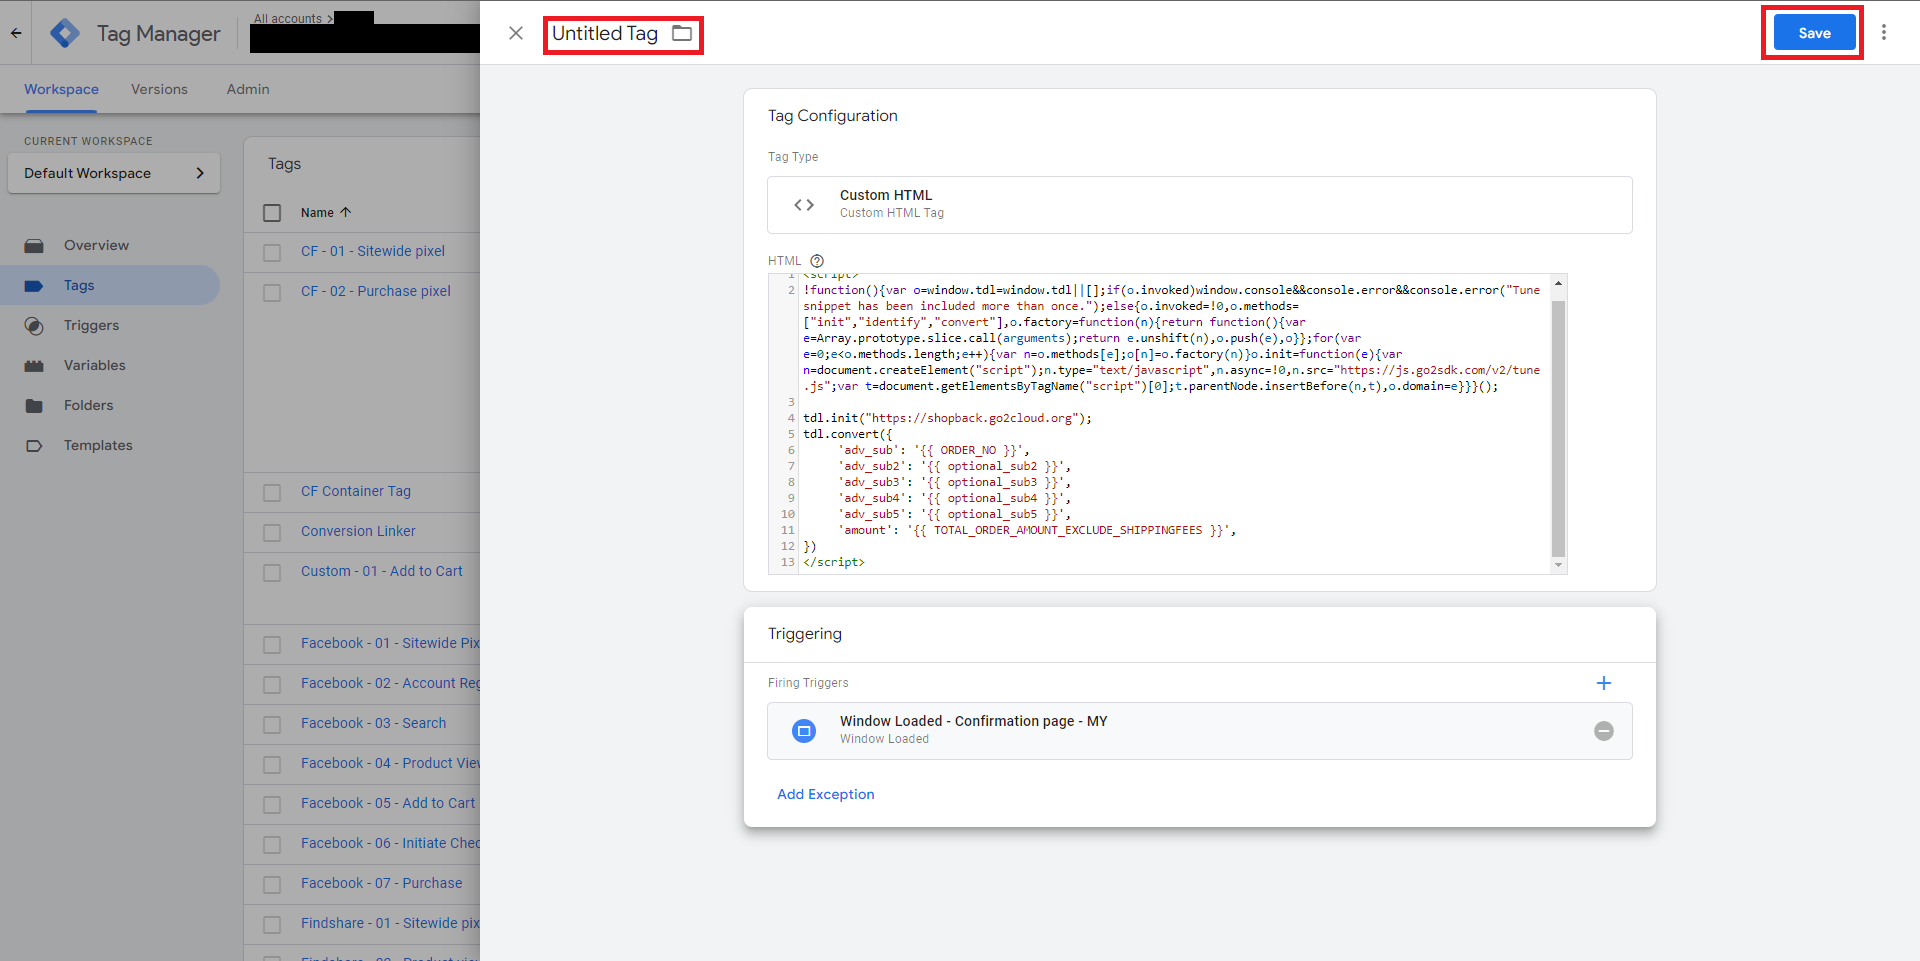
Name the Tag appropriately, e.g. “ShopBack - Tag - Order Confirmation” and click “Save”
After this step, the insertion of GTM Tags and Triggers has been completed.
2C. Verifying the correct steps have been taken
Success!After the end of the above steps, you should have created the following:
Tags
- ShopBack - Tag - Landing Page
- ShopBack - Tag - Order Confirmation
Triggers
- ShopBack - Trigger - Landing Page
- ShopBack - Trigger - Order Confirmation
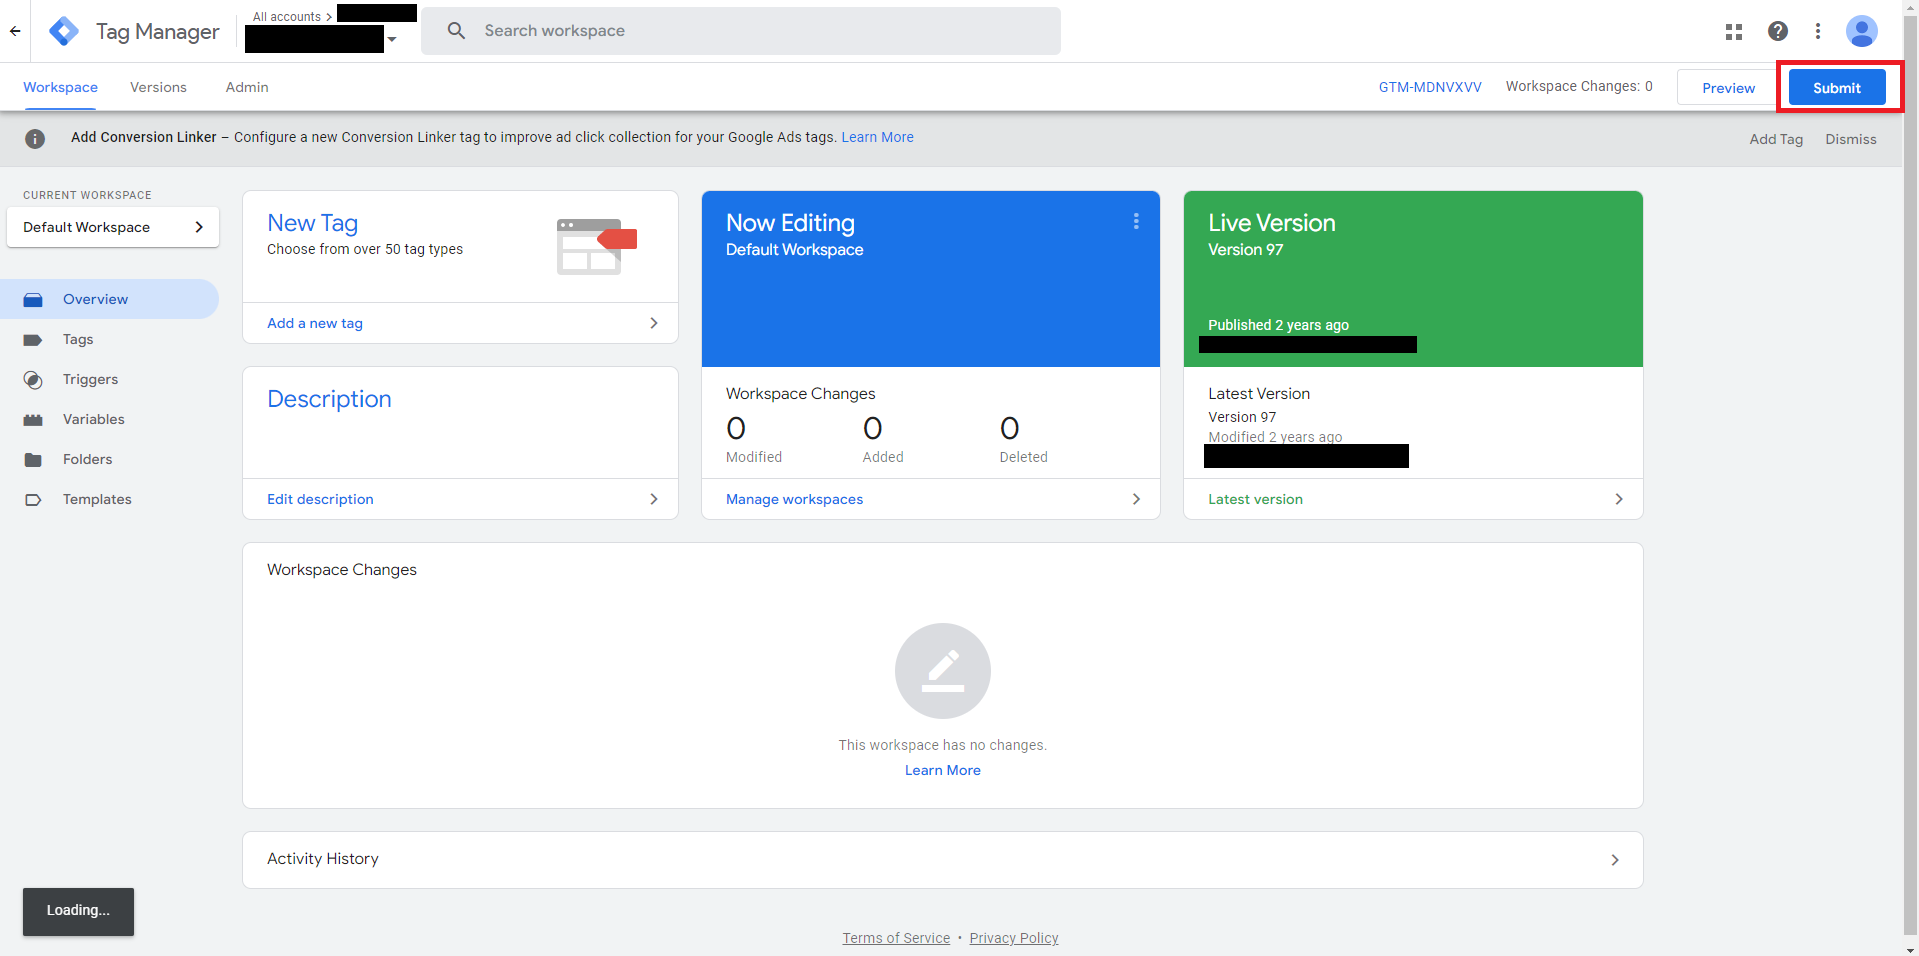
Submit and save changes
Updated 11 months ago
What’s Next
Please notify your ShopBack representative to begin internal testing.