
[WooCommerce] Add ShopBack PayLater explainer to your Shop
The ShopBack PayLater explainer has been proven to be a great tool to further drive conversion by visualising how ShopBack PayLater works. It can be also used for social media, newsletter, etc.
Per default, we always prepare a ShopBack PayLater explainer for you - however, it is a conversion option that we leave to you as a merchant (though we strongly suggest to use it). We will be sharing your individual version with you once the ShopBack PayLater integration has been completed - however, here a general preview.
To set up your ShopBack PayLater explainer on WooCommerce, it takes following steps:
Step 1: Create a page with our prepared template
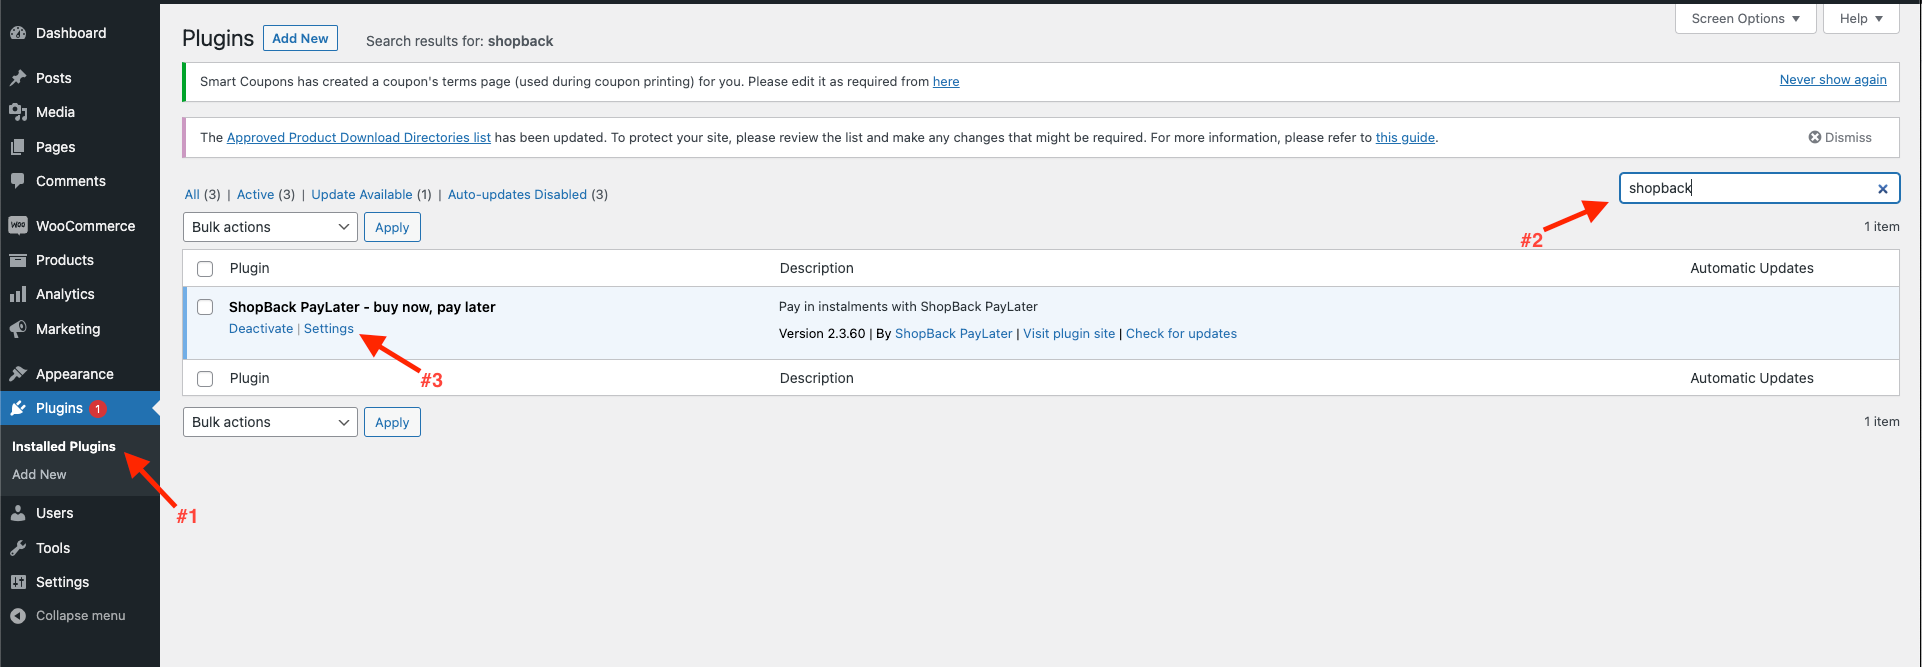
- Login to your Wordpress admin
- Navigate to the Plugin section and search for 'ShopBack' and click on Settings
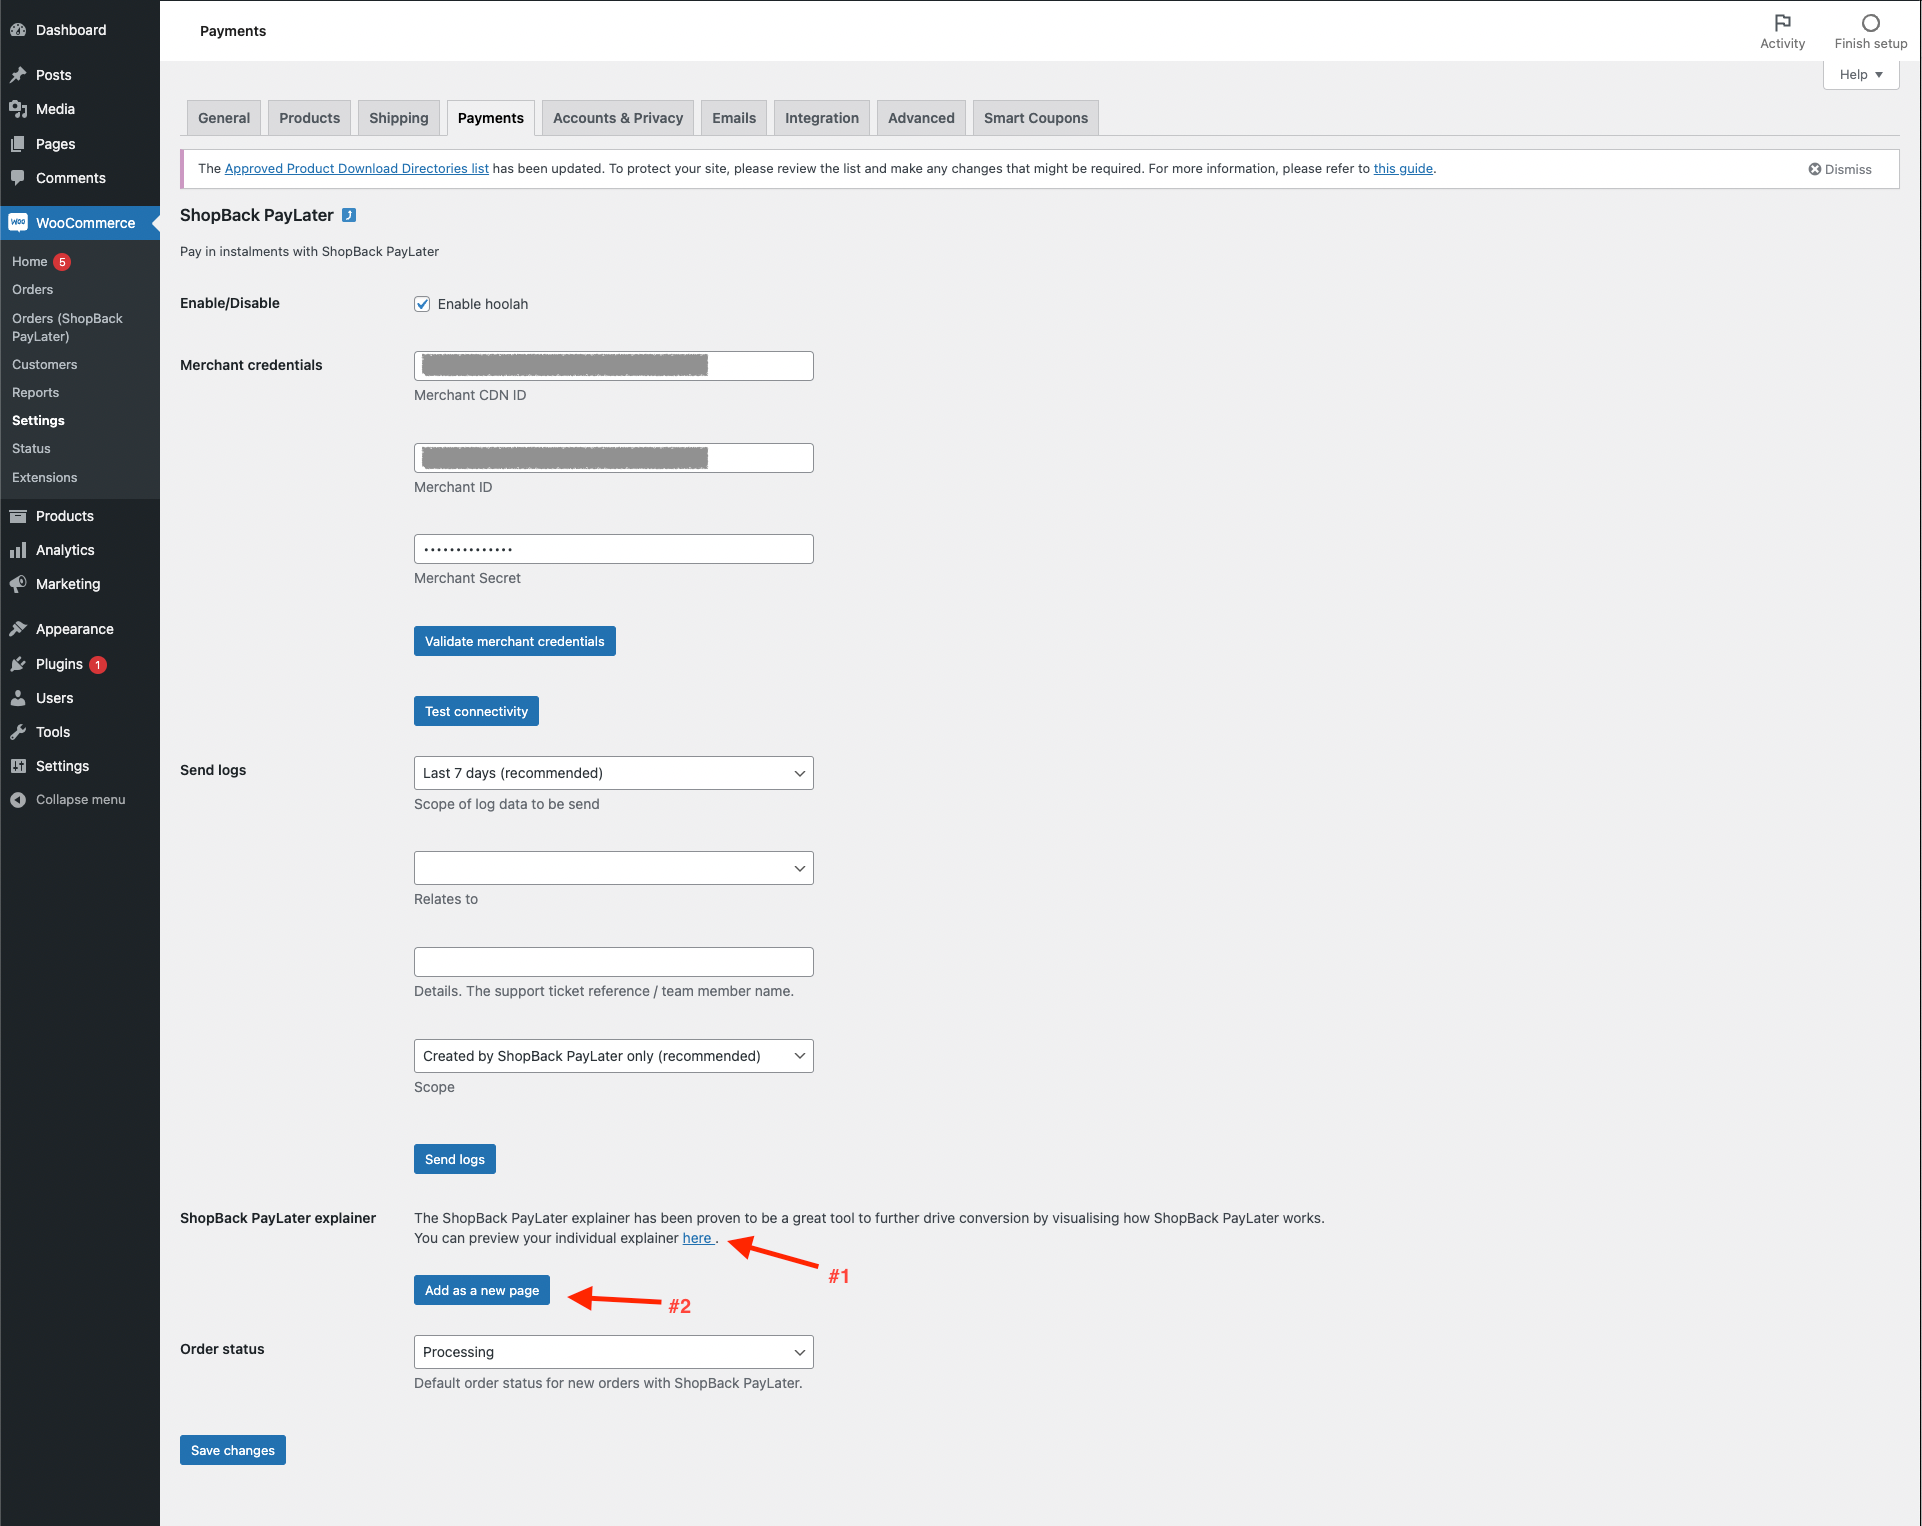
- Click on Add as new page to create a ShopBack PayLater explainer in your Pages section (you can also preview your explainer by clicking on the preview link, however, keep in mind that this will open it outside of your shop (so you won't see your logo / show website) You will see following confirmation page
Step 2: Add the newly created page to your shop navigation
- Navigate to Appearance, followed by Menus
- Select the appropriate menu (if your website has multiple menus) and within the 'Pages' section click on View All . Select ShopBack PayLater instalments and click on Add to Menu
Don't forget to save your changes.
Updated over 1 year ago