
Online Payment
Please go through the following steps to setup ShopBack Pay on Woocommerce.
Step 1: Generate online integration credentials
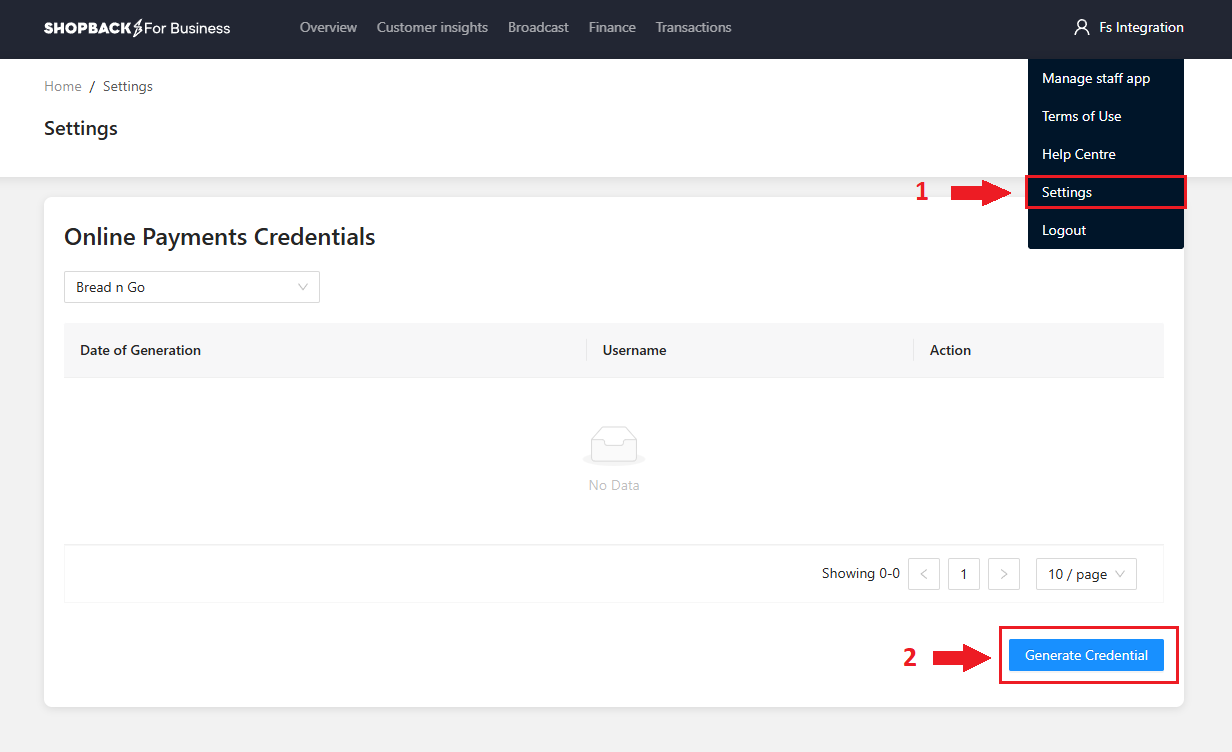
a. Sign in to your ShopBack for Business - Merchant Portal.
- If you have not created an account, refer to our guide here.
- Skip this step if you have already generated the integration credentials.
b. Once signed in, go to the "Settings" page from the User menu or click the link here directly Settings page for SG or Settings page for MY , and click 'Generate Credential'
c. Once your credentials generated successfully, you may download the credentials for safe keeping. Please note, the Merchant Secret credentials can only be viewed once.
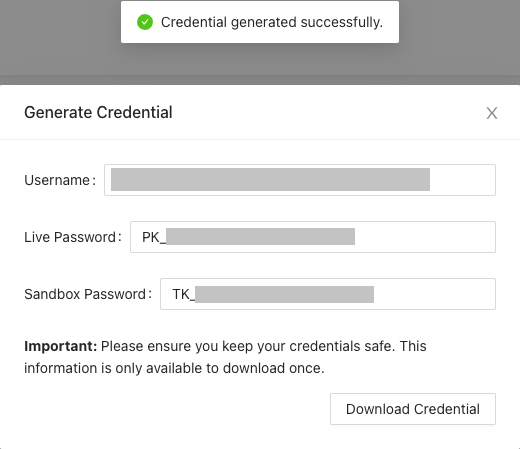
Username = {Merchant ID}
Live Password ={Production Merchant Secret}
Sandbox Password = {Sandbox Merchant Secret}
Step 2: Plugin deployment
a. Download ShopBack WooCommerce plugin zip file:
b. Open your WordPress admin and click on ‘Plugins’. You will see an overview of your installed plugins.

c. Click on ‘Add new plugin’ followed by click on ‘Upload plugin’

d. Choose the file and click on ‘Install now’

e. Click on ‘Activate Plugin’

Step 3: Configure the plugin
a. Go back to ‘Plugins’, locate the ShopBack payments app plugin and click on ‘Settings’

b. Ensure that ‘Enable ShopBack payments app’ is checked and enter the Merchant ID and Merchant Secret.
Once done, click on ‘Validate merchant credentials’.
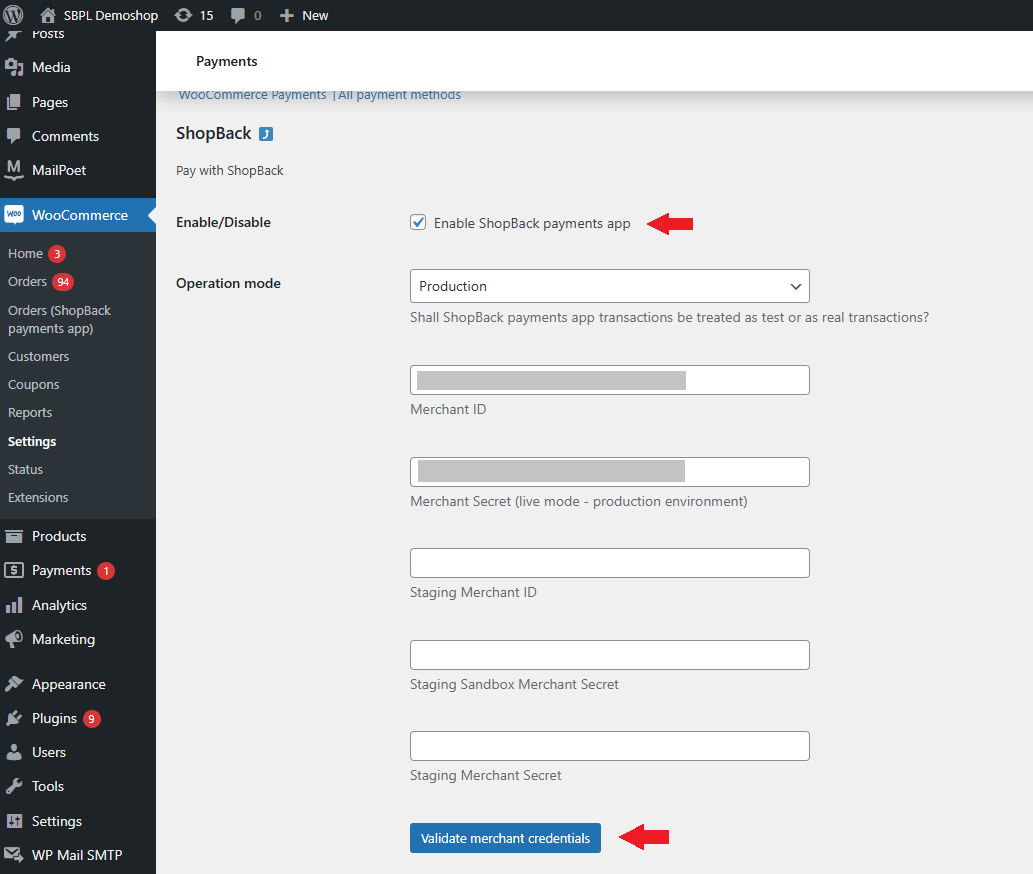
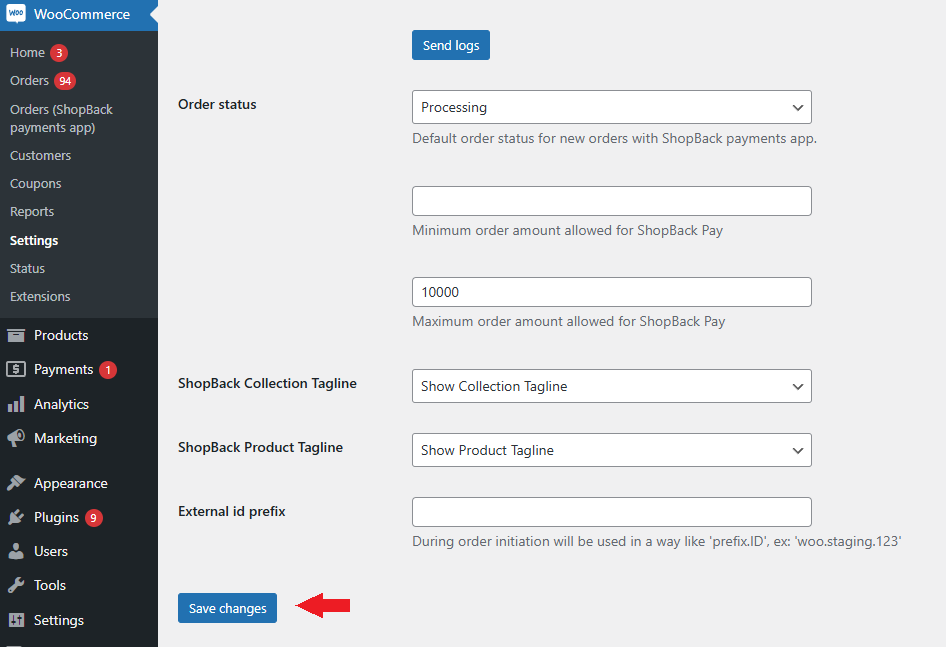
c. Only when you see green confirmation check-marks, click on ‘Save changes’.
Otherwise, return to step 3 and validate the credentials.
Step 4: Test
Validate the checkout with any product from your website. Proceed such as you are paying with ShopBack Pay and make sure to get redirected to ShopBack Pay payment page successfully. You can refer more in this article on testing your checkout

You have completed the WooCommerce plugin setup. Your consumers can start paying with ShopBack Pay!
Updated about 2 months ago